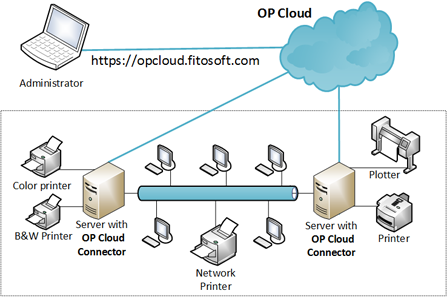
OP Cloud Connector
If there are multiple Print Servers available on your network and some computers need to print to more than one Print Server, you will need to install the OP Cloud Connector software on each Print Server. OP can then be configured to select different print servers on your network to control specific print jobs.
Windows Setup
Install OP Cloud Connector and configure it for a
specific print server:
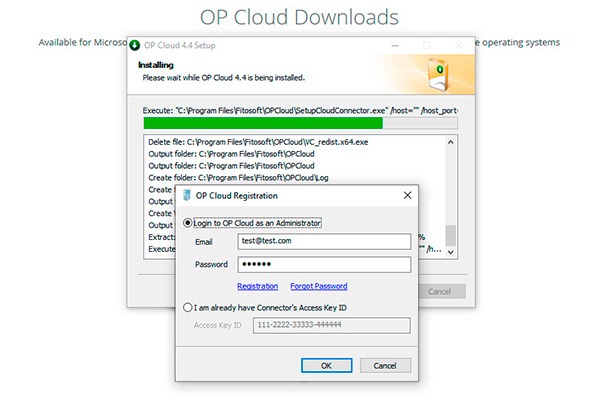
1. Download and run the latest OP Cloud Connector from
https://opcloud.fitosoft.com/#download
2. Follow the installation instructions displayed on the screen
3. The OP Cloud Connector will be
installed on your computer
Enter the OP administrator's name and password, or enter the OP Cloud Access ID
Select OP Server from the list:
Linux Setup
Installation:
1. Download OP Cloud Connector from: https://opcloud.fitosoft.com/#download
2. Extract archive
$ tar -zxf op_cloud_connector.tar.gz
3. Open op_cloud_connector
directory:$ cd op_cloud_connector
4. Run install script
$ sudo ./install.sh
Configure OP Cloud Connector for a specific print server:
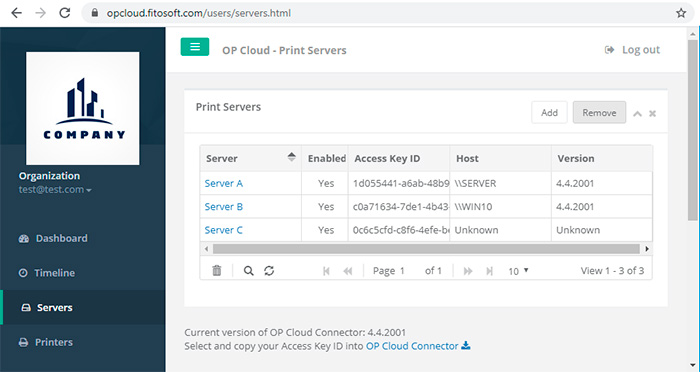
OP - Tracks and controls printing activity - https://opcloud.fitosoft.com
OP Connector's Access Keys ID on https://opcloud.fitosoft.com/users/servers.html
Enter existing OP Connector's Access Key ID: 111-2222-33333-44444-555555
Enable tracing to /etc/cups/op_trace.txt (0 - off, 1 - on) [0]: 0
Enable printing if exception occurred (0 - off, 1 - on) [1]: 1
Prepend each DeviceURI value for all printers with 'tea4cups://') [Y]: Y
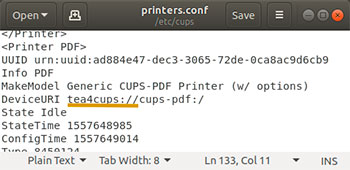
From CUPS' web interface, prepend the Device URI for each printer with 'tea4cups://'.
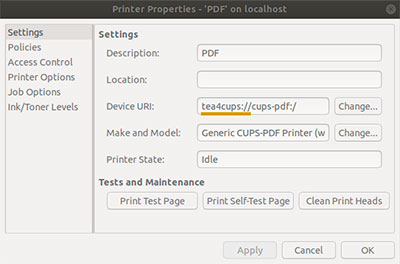
Alternatively, directly modify CUPS' printers.conf file, or use the lpadmin command line tool to prepend each DeviceURI value with 'tea4cups://'. If you
modified printers.conf directly instead of using lpadmin then don't forget to
restart CUPS.
To remove 'tea4cups://' from all printers, launch the remove_tea4cups.py script.
Troubleshooting:
1 - Set "trace = 1" in the [global] section of
/etc/cups/op-desktop-connector.conf
2 - Print something to a print queue
managed by Tea4CUPS.
3 - Look at /etc/cups/op_trace.txt
file for diagnostic and error messages.
Home